
This article is part of a series on building a full stack application.
- Part 1: Introduction
- Part 2: Hasura Cloud and database
- Part 3: Setting up the IDP (current)
- Part 4: Configuring the frontend
- Part 5: Coding the frontend
Overview
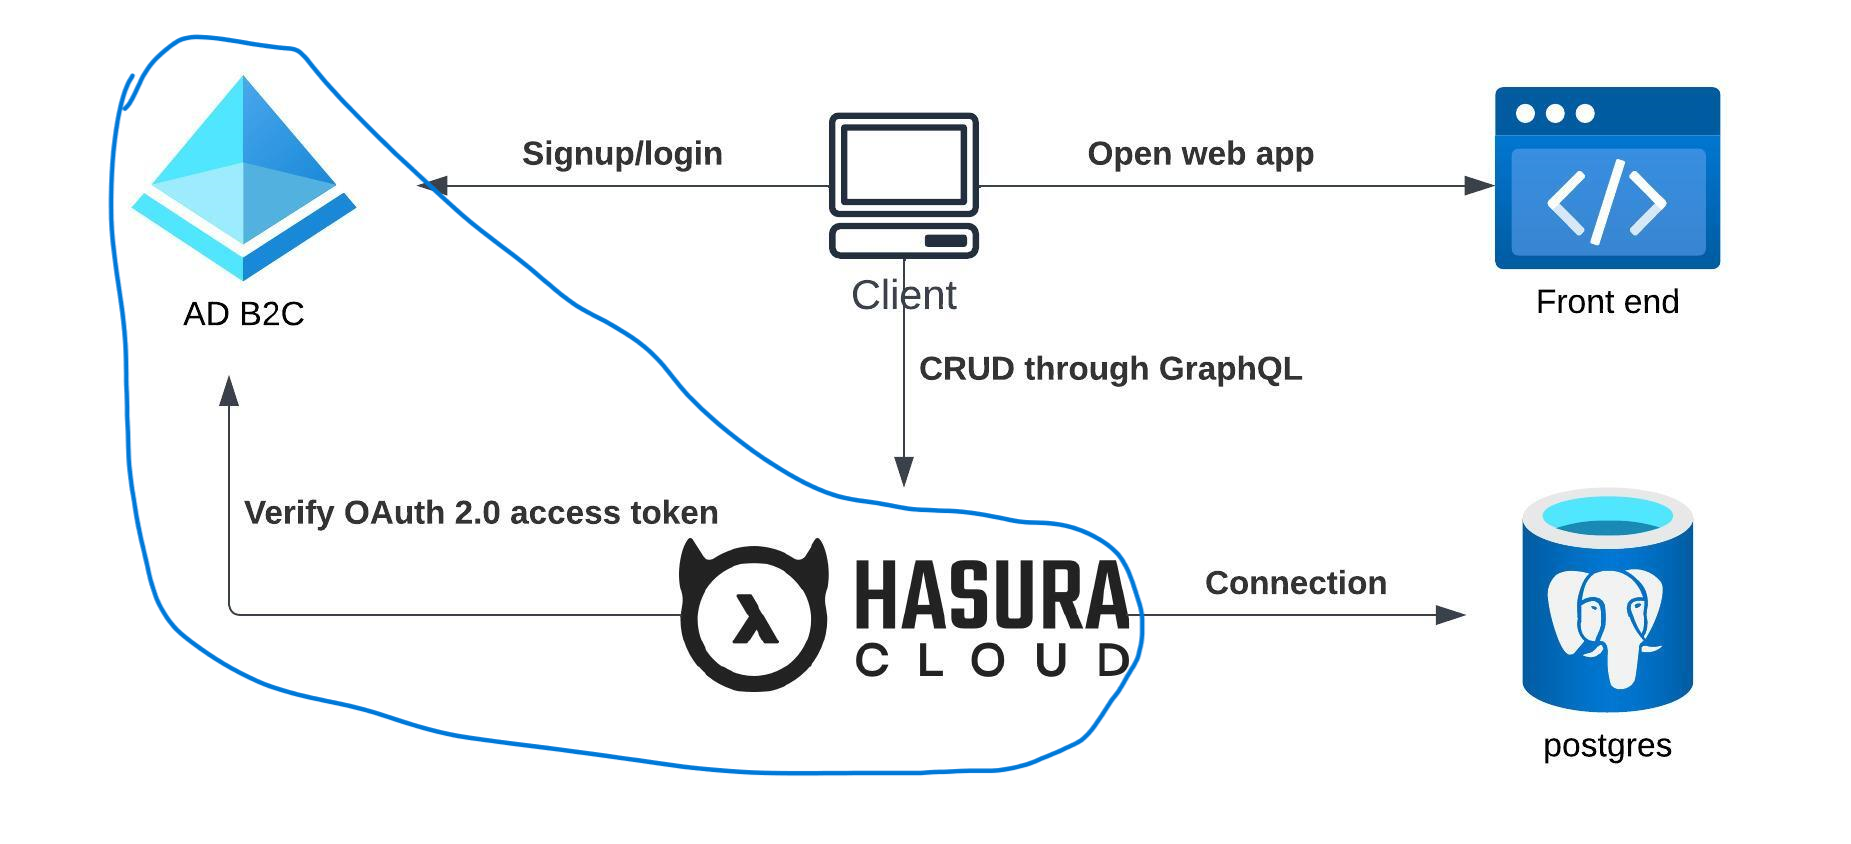
Our focus in this article is on establishing the identity provider for the application. Before we dive in, let’s clarify the meanings of some key terms. Authentication, the process of identifying an entity, aims to answer the question of who someone or something is. On the other hand, authorization involves granting access to a resource, enabling the application to determine user permissions.
Authentication is a complex challenge with numerous pitfalls, making it advisable to leverage a third-party identity provider. This approach allows us to concentrate on application development without the added burden and worry about technical aspects of authentication security.
For our identity provider, we’ve chosen Microsoft Entra ID. This solution provides cloud identity management for consumer-facing web and mobile applications, offering a highly available global service that scales seamlessly to accommodate vast numbers of identities. Entra ID takes care of authentication, while authorization is managed by Hasura.
Today’s agenda includes:
- Setting up prerequisites.
- Creating an Entra tenant.
- Registering the web application.
- Create signup/login policies.
- Configuring Hasura to accept access tokens.
Setting up prerequisites
To begin, follow these steps to register for an Azure account. You can log in with your personal Microsoft account or create a new one. During the registration process, Azure will prompt you to provide some essential details, including a credit card number. It’s important to note that you will not incur charges for the services utilized in this article, as we will exclusively be working with free services.
Create Entra tenant
To facilitate the registration of users and applications, we first require a designated space to store them, and this is achieved through a tenant. A tenant represents your organization, whether it’s personal, small business, or enterprise. Microsoft provides comprehensive documentation on creating a tenant. Follow their documentation to setup your tenant. Here are some recommendations during the tenant creation process:
- Reuse the unique tenant name you’ve determined before.
- Choose the Azure AD B2C tenant type.
Register web application
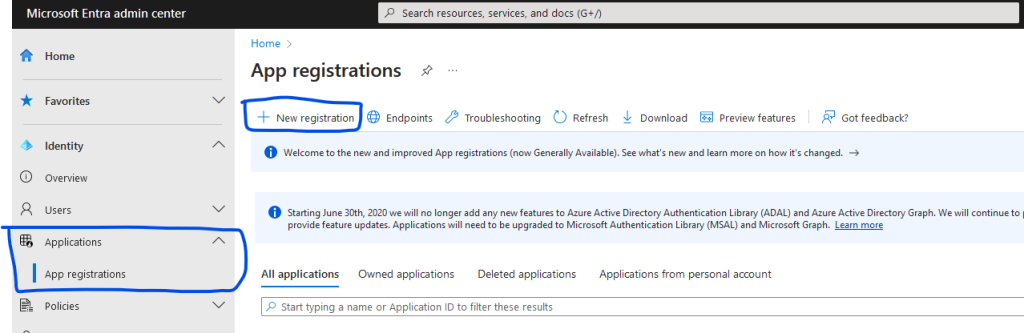
Navigate to the Entra Admin Center and go to Applications -> App Registrations. Click on the “New registration” button.
Provide a name for the application, such as MovieDBApp. Choose the third option for supported account types (account in any identity provider or organizational directory). Opt for Single-page applicaiton (SPA) for Redirect URI and enter http://localhost:3000 as the redirect URL value. This URI denotes where the user will be redirected after authentication. Click on the “Register” button to finalize the application registration.
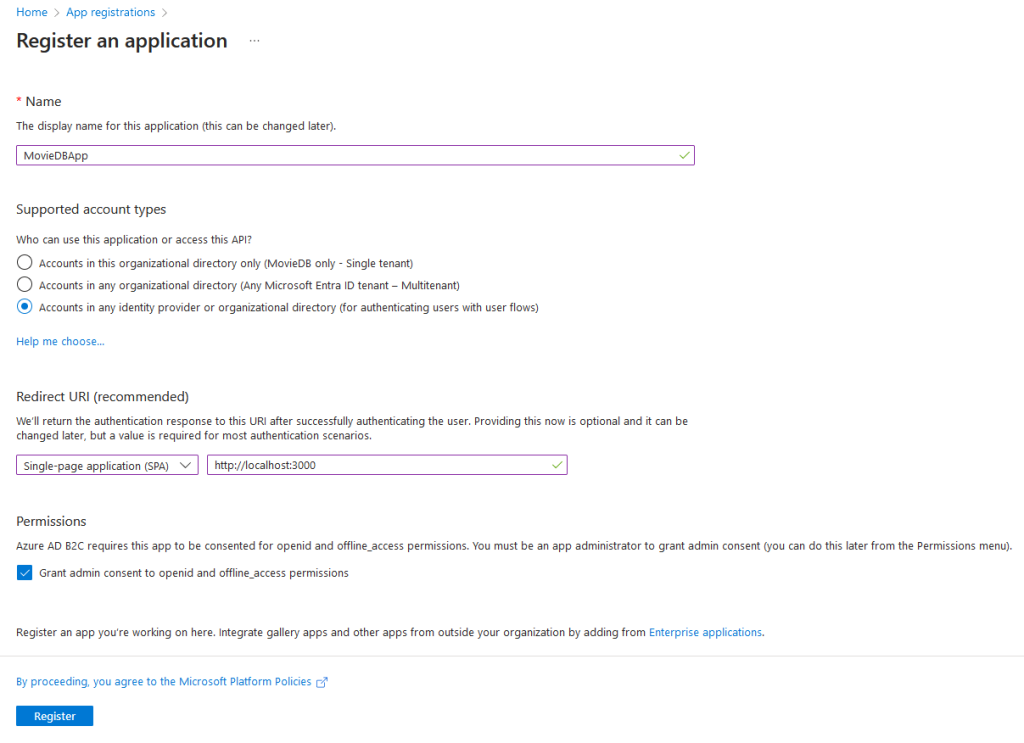
You will be redirected to the app registration overview page. Take note of the Application (Client) ID. While it’s not necessary to store it immediately, you can always return to this page to retrieve it. However, we will need it later on.
Create signup/login policies
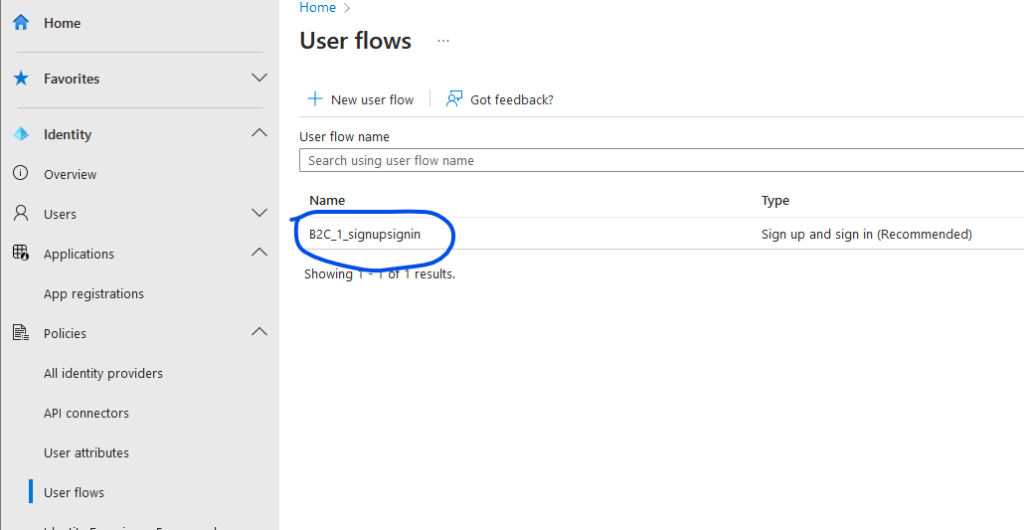
In the Entra Admin Center, navigate to Policies -> User Flows. Click on the “New user flow” button and select the flow type “Sign up and sign in”. Choose the recommended version and click create. Provide a name, for example, ‘signupsignin’. In step 2, Identity Providers, select Local accounts -> Email signup. Do not enforce any Multi-Factor Authentication (MFA). In step 5, Attributes, select the following attributes: Given name, Surname, Email Address, Display Name, and User’s Object ID (you might need to click on ‘Show more’). For all attributes, choose ‘Collect attribute’ as well as ‘Return claim’. Press ‘Create’.
Now, we’ve configured a signup and signin policy, determining how end users of the web application can log in and register. Additionally, we’ve specified which attributes will be returned to the application. Later, these attributes will be used to create a user profile in the database.
Configure Hasura to accept access tokens
Later, in our application, when the user logs in (authenticates via Entra ID), the web application is allowed to retrieve an access token on behalf of the user. The access token is a JWT token containing information about the user. We need to configure Hasura to accept tokens issued by our Entra ID tenant; otherwise, the user won’t be able to access any private resources in the application.
Head over to your Hasura Cloud project. On the projects page, click the cogwheel to open the settings page. Navigate to Env vars and click on the “New env var” button. Provide the following values:
Key: HASURA_GRAPHQL_JWT_SECRET.
Value:
{
    "claims_map": {
        "x-hasura-allowed-roles": [
            "user",
            "admin"
        ],
        "x-hasura-default-role": "user",
        "x-hasura-user-id": {
            "path": "$.oid"
        }
    },
    "jwk_url": "https://{domain}.b2clogin.com/{domain}.onmicrosoft.com/discovery/v2.0/keys?p={user-flow-name}"
}
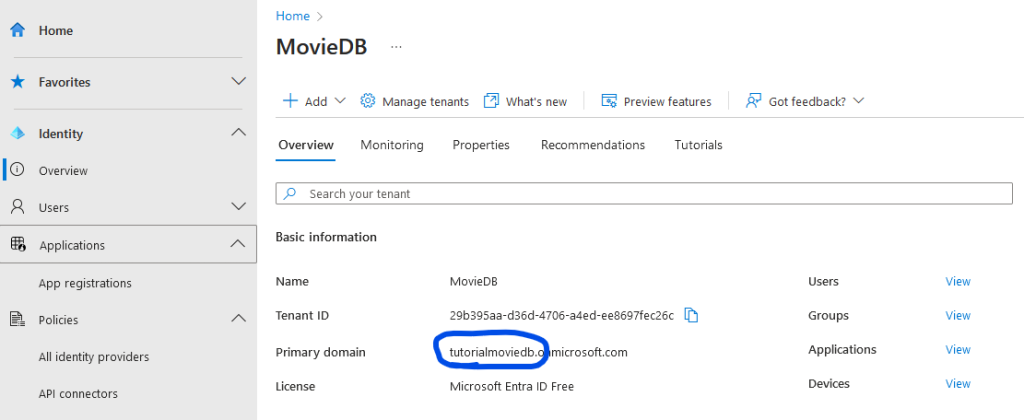
Replace {domain} with the primary domain of your tenant (tutorialmoviedb in my case), and substitute {user-flow-name} with the name of your user flow (B2C_1_signupsignin in my case). Click the “Add” button to save the environment variable. For additional background information on how Hasura secures API access using JWT access tokens, refer to the Hasura documentation.
Conclusion
In conclusion, we have successfully established our identity provider, enabling authentication for the application. Moreover, we’ve configured Hasura to accept tokens issued by our identity provider. In the upcoming article, our focus will shift towards configuring the frontend application, enabling users to log in and retrieve data from Hasura.
Parts
- Part 1: Introduction
- Part 2: Hasura Cloud and database
- Part 3: Setting up the IDP (current)
- Part 4: Configuring the frontend
- Part 5: Coding the frontend